How to Clean Leather Gloves

blog_img

To clean leather gloves without ruining them, use a damp microfiber cloth with mild soap (like saddle or Castile soap) and gently wipe the surface. Avoid soaking or harsh chemicals. For stains, use vinegar for watermarks, rubbing alcohol for ink, and baking soda for oil. Always air dry at room temperature and apply leather conditioner to prevent cracking.

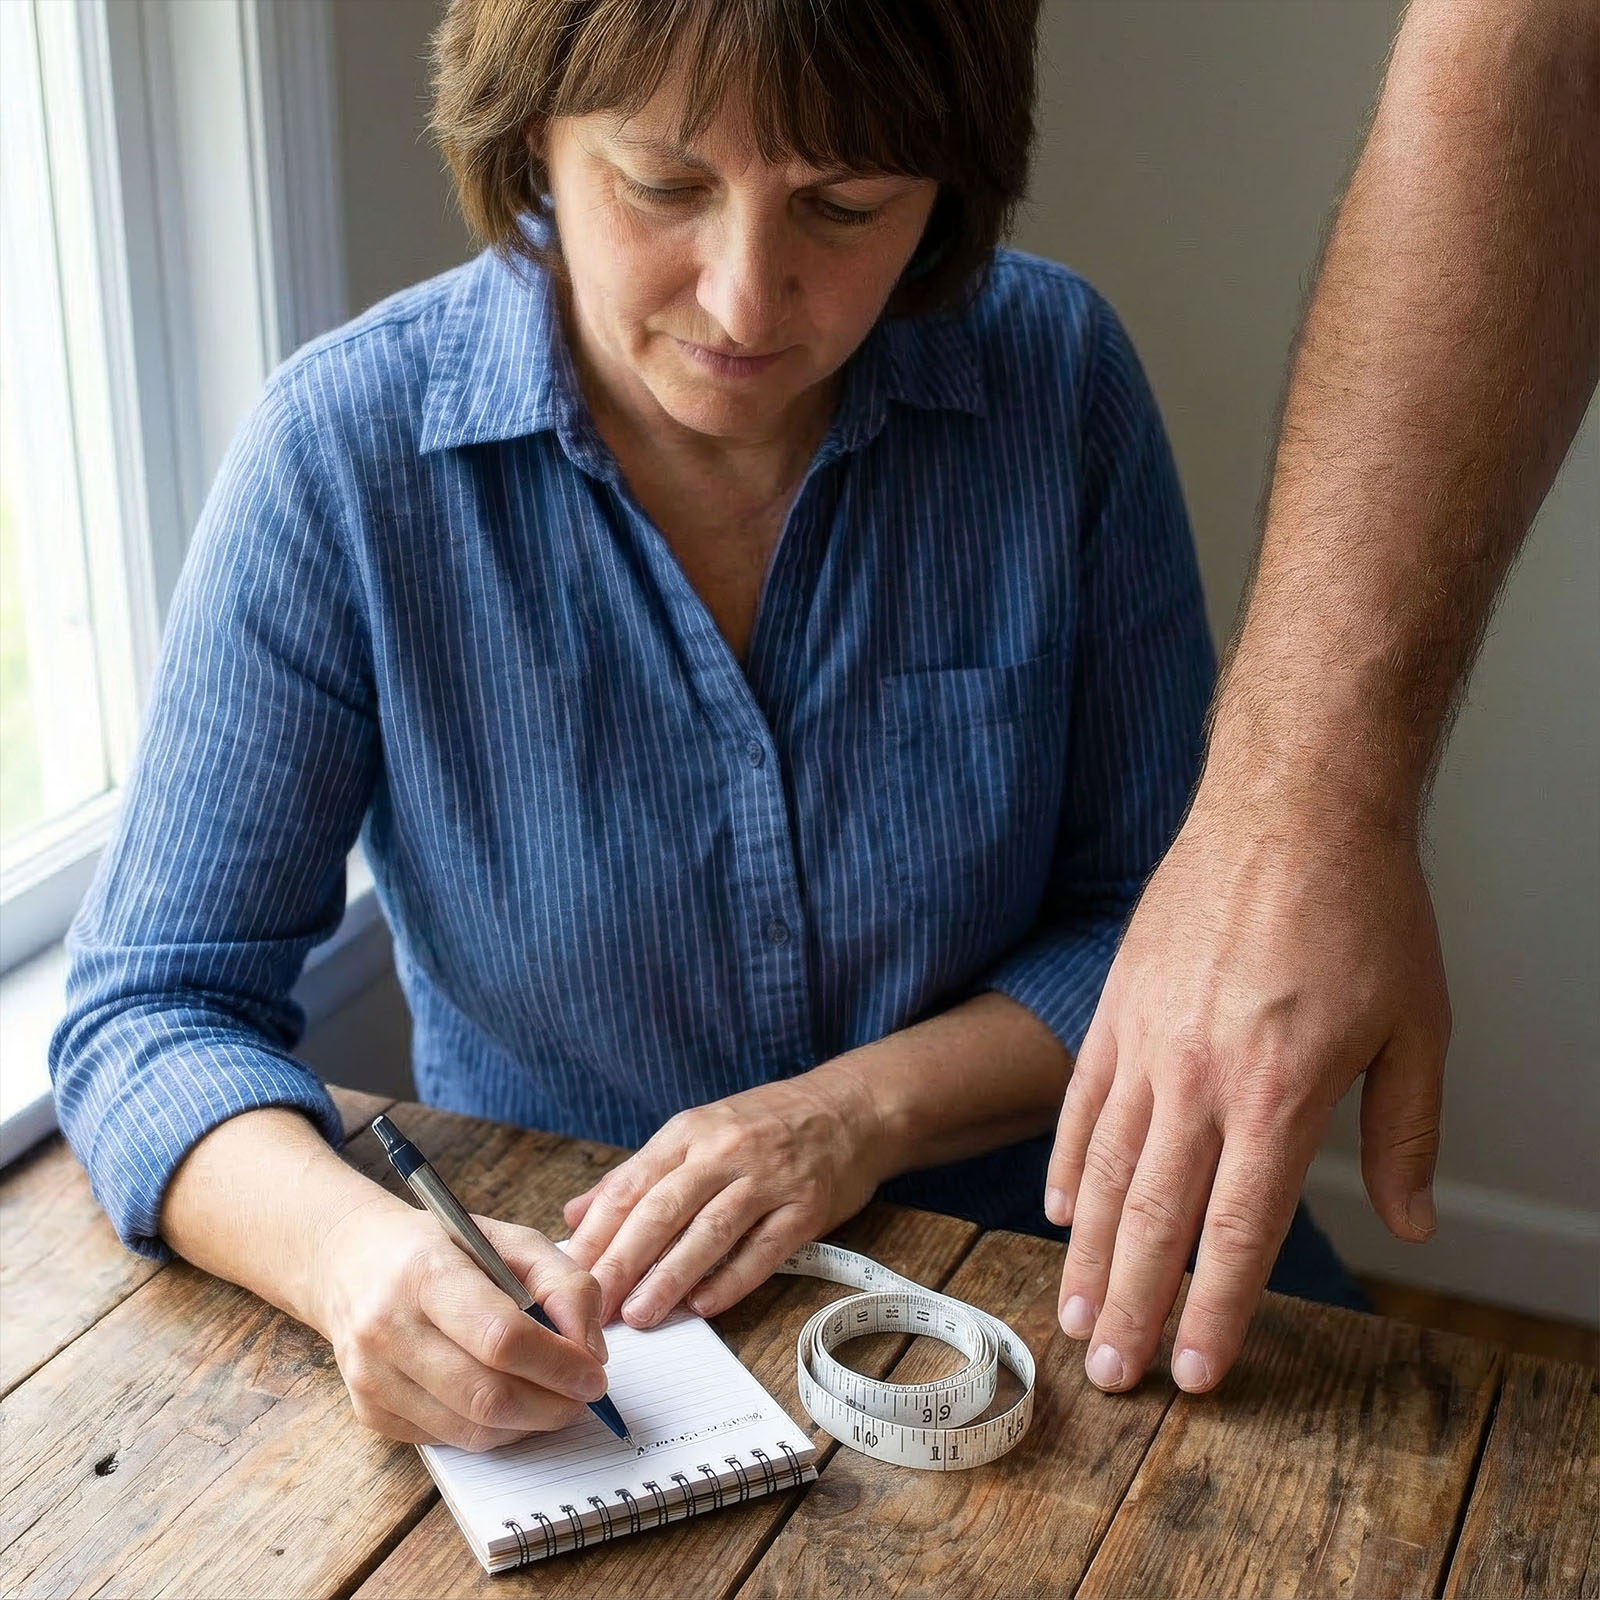
The Moment You Realize Your Leather Gloves Need Cleaning

It happens to everyone. You slip your hands into your favorite pair of leather gloves. Once soft, sleek, and comfortable. Only to notice something feels different. The leather is stiff, the fingers don’t move as smoothly, and maybe there’s even a faint odor you hadn’t noticed before. You take them off and inspect them closely.

There it is. Dark smudges on the fingertips, a few stubborn stains, and a dull, dry texture that wasn’t there before. Maybe you wore them out in the rain one too many times, handled something greasy without thinking, or simply let months of wear build up without realizing it.

Now the question hits you: How do I clean these without ruining them?

You’ve heard the warnings: “Never put leather gloves in the washing machine!” But beyond that, advice is scattered. Some say use soap, others say water is the enemy, and then there’s the fear of shrinking or cracking the leather completely.

If this sounds familiar, you’re in the right place. I wrote this guide because I’ve been there too. Yes, I know how frustrating it is to want to care for your gloves properly but feel overwhelmed by conflicting advice.

This guide will take you through exactly how to clean your leather gloves the right way, step by step, so you can restore their softness, maintain their quality, and make them last for years to come. Let’s get started!

Cleaning Leather Gloves with Care

Leather gloves are a timeless accessory, offering warmth, protection, and style. Whether they’re made from premium deerskin, soft lambskin, or durable cowhide, keeping them clean without damaging their integrity requires special care. Unlike fabric gloves, leather is porous, absorbs oils, and can stiffen or crack if not properly maintained. Washing them incorrectly can ruin them forever.

If you’ve ever wondered how to clean leather gloves without ruining them, here we’ll cover everything you need to know, from removing stains to conditioning for long-term durability. Follow these steps to keep your gloves looking new while preserving their softness and shape.

Why You Should Avoid Machine Washing Leather Gloves

Let’s get this out of the way, never toss your leather gloves into the washing machine. The harsh agitation, excessive water exposure, and strong detergents strip the leather of its natural oils, causing it to dry out, crack, and shrink beyond repair.

Instead, leather gloves require gentle hand-cleaning methods that respect the material’s natural properties.

Common Mistakes That Ruin Leather Gloves:

  • Using hot water (causes shrinkage and stiffness)
  • Soaking in water (weakens leather fibers)
  • Using harsh chemicals (removes natural oils, making gloves brittle)
  • Drying with heat (warps and cracks the leather)

It might seem tempting to toss your leather gloves into the washing machine for a quick clean, especially if they’re heavily soiled. But doing so is a one-way ticket to ruining them. Unlike fabric gloves, leather is a natural material that requires careful handling to maintain its softness, shape, and durability.

What Happens When You Machine Wash Leather Gloves?

  1. Leather Absorbs Water Like a Sponge
    Leather is porous, meaning it soaks up water easily. When fully submerged or excessively wet, the natural oils that keep the leather supple and flexible are washed away. Without these oils, leather becomes dry, stiff, and prone to cracking.
  2. Agitation Warps the Shape
    Washing machines use spinning and tumbling to clean fabric. But for leather gloves, this rough treatment distorts the shape, weakens the seams, and stretches the material unevenly. Once warped, they may never fit your hands properly again.
  3. Harsh Detergents Strip Natural Oils
    Most laundry detergents contain strong chemicals that are designed to break down dirt and stains. These chemicals strip away the essential oils in leather, leading to brittleness and premature aging. Without these oils, your gloves will feel rough, dry, and more susceptible to damage.
  4. Heat Causes Shrinkage and Cracking
    The final stage in most washing machines involves a high-speed spin cycle, and many people follow up with machine drying. Heat is leather’s worst enemy. It causes the material to shrink unevenly, stiffen, and crack. If your gloves are lined, heat can also damage the interior fabric, making them uncomfortable to wear.

The Right Way to Clean Leather Gloves

Instead of machine washing, use a gentle hand-cleaning method with a damp microfiber cloth and mild soap. For stains, spot-treat with vinegar for watermarks, rubbing alcohol for ink, or baking soda for oil stains. Always air dry at room temperature and finish with a leather conditioner to restore moisture.

To safely clean your leather gloves, follow the right techniques below.

Step 1: Identify the Type of Leather

Before you start cleaning, it is crucial to determine what type of leather your gloves are made from. Different leathers react differently to water, soap, and conditioners—using the wrong method can cause stiffness, discoloration, shrinkage, or permanent damage.

Think of leather like human skin. Some skin types need more moisture, while others react poorly to certain products. The same applies to leather gloves. Understanding the material will help you choose the safest cleaning approach, so your gloves stay soft, flexible, and in top condition.

How to Identify Your Leather Type

Most gloves fall into one of four main leather categories. Below are the key features of each and their proper cleaning approach.

1. Full-Grain Leather (Most Durable, Found in Work Gloves)

  • Texture: Thick, sturdy, and slightly stiff at first but softens over time.
  • Appearance: Natural grain pattern, may have visible pores or imperfections.
  • Common Uses: Heavy-duty work gloves, motorcycle gloves, and driving gloves.
  • Cleaning Approach: Spot clean with a damp microfiber cloth and mild soap. Condition with a leather balm or oil after drying.
  • What to Avoid: Excessive water exposure. Full-grain leather soaks up moisture quickly, leading to cracking when it dries.

2. Nappa Leather (Soft & Luxurious, Found in Dress Gloves)

  • Texture: Smooth, buttery, and flexible.
  • Appearance: A refined, uniform finish with a slight sheen.
  • Common Uses: High-end dress gloves, fashion gloves, and luxury driving gloves.
  • Cleaning Approach: Use a very mild soap and a barely damp cloth. Avoid excessive moisture. Condition with a high-quality leather cream.
  • What to Avoid: Any harsh detergents or vigorous scrubbing. Nappa leather is more delicate than other types and can easily dry out or lose its smooth finish.

3. Deerskin Leather (Flexible & Naturally Water-Resistant)

  • Texture: Soft, supple, and very flexible.
  • Appearance: Matte finish with visible natural grain. Often has a slightly pebbled texture.
  • Common Uses: Outdoor gloves, riding gloves, and casual everyday gloves.
  • Cleaning Approach: Can handle mild soap and slightly more moisture than other leathers. Clean with a damp cloth and gently massage the leather while cleaning to maintain flexibility. Use a conditioner after drying.
  • What to Avoid: Drying near heat sources. Deerskin leather is naturally resistant to moisture, but direct heat can make it stiff.

4. Suede or Nubuck Leather (Requires Special Care)

  • Texture: Soft, velvety, and delicate.
  • Appearance: Matte and slightly fuzzy with a fine nap.
  • Common Uses: Fashion gloves and casual winter gloves.
  • Cleaning Approach: Avoid water-based cleaning. Instead, use a suede brush to remove dirt. For stains, a suede eraser or white vinegar can help lift them.
  • What to Avoid: Water, soap, or regular leather conditioner. These can ruin the texture and leave permanent marks.

How to Confirm Your Leather Type

If you’re unsure about the type of leather your gloves are made of, check:

  1. The Manufacturer’s Label: Many gloves have care tags inside that specify the leather type and recommended cleaning method.
  2. The Texture and Feel: If your gloves feel thick and slightly rough, they are likely full-grain leather. If they are buttery smooth, they are probably Nappa leather.
  3. The Appearance: Deerskin gloves tend to have a more natural, pebbled look, while suede has a soft, fuzzy surface.

Understanding your leather type is the foundation of proper glove care. Once you’ve identified it, you can move on to the correct cleaning method without the risk of ruining your gloves.

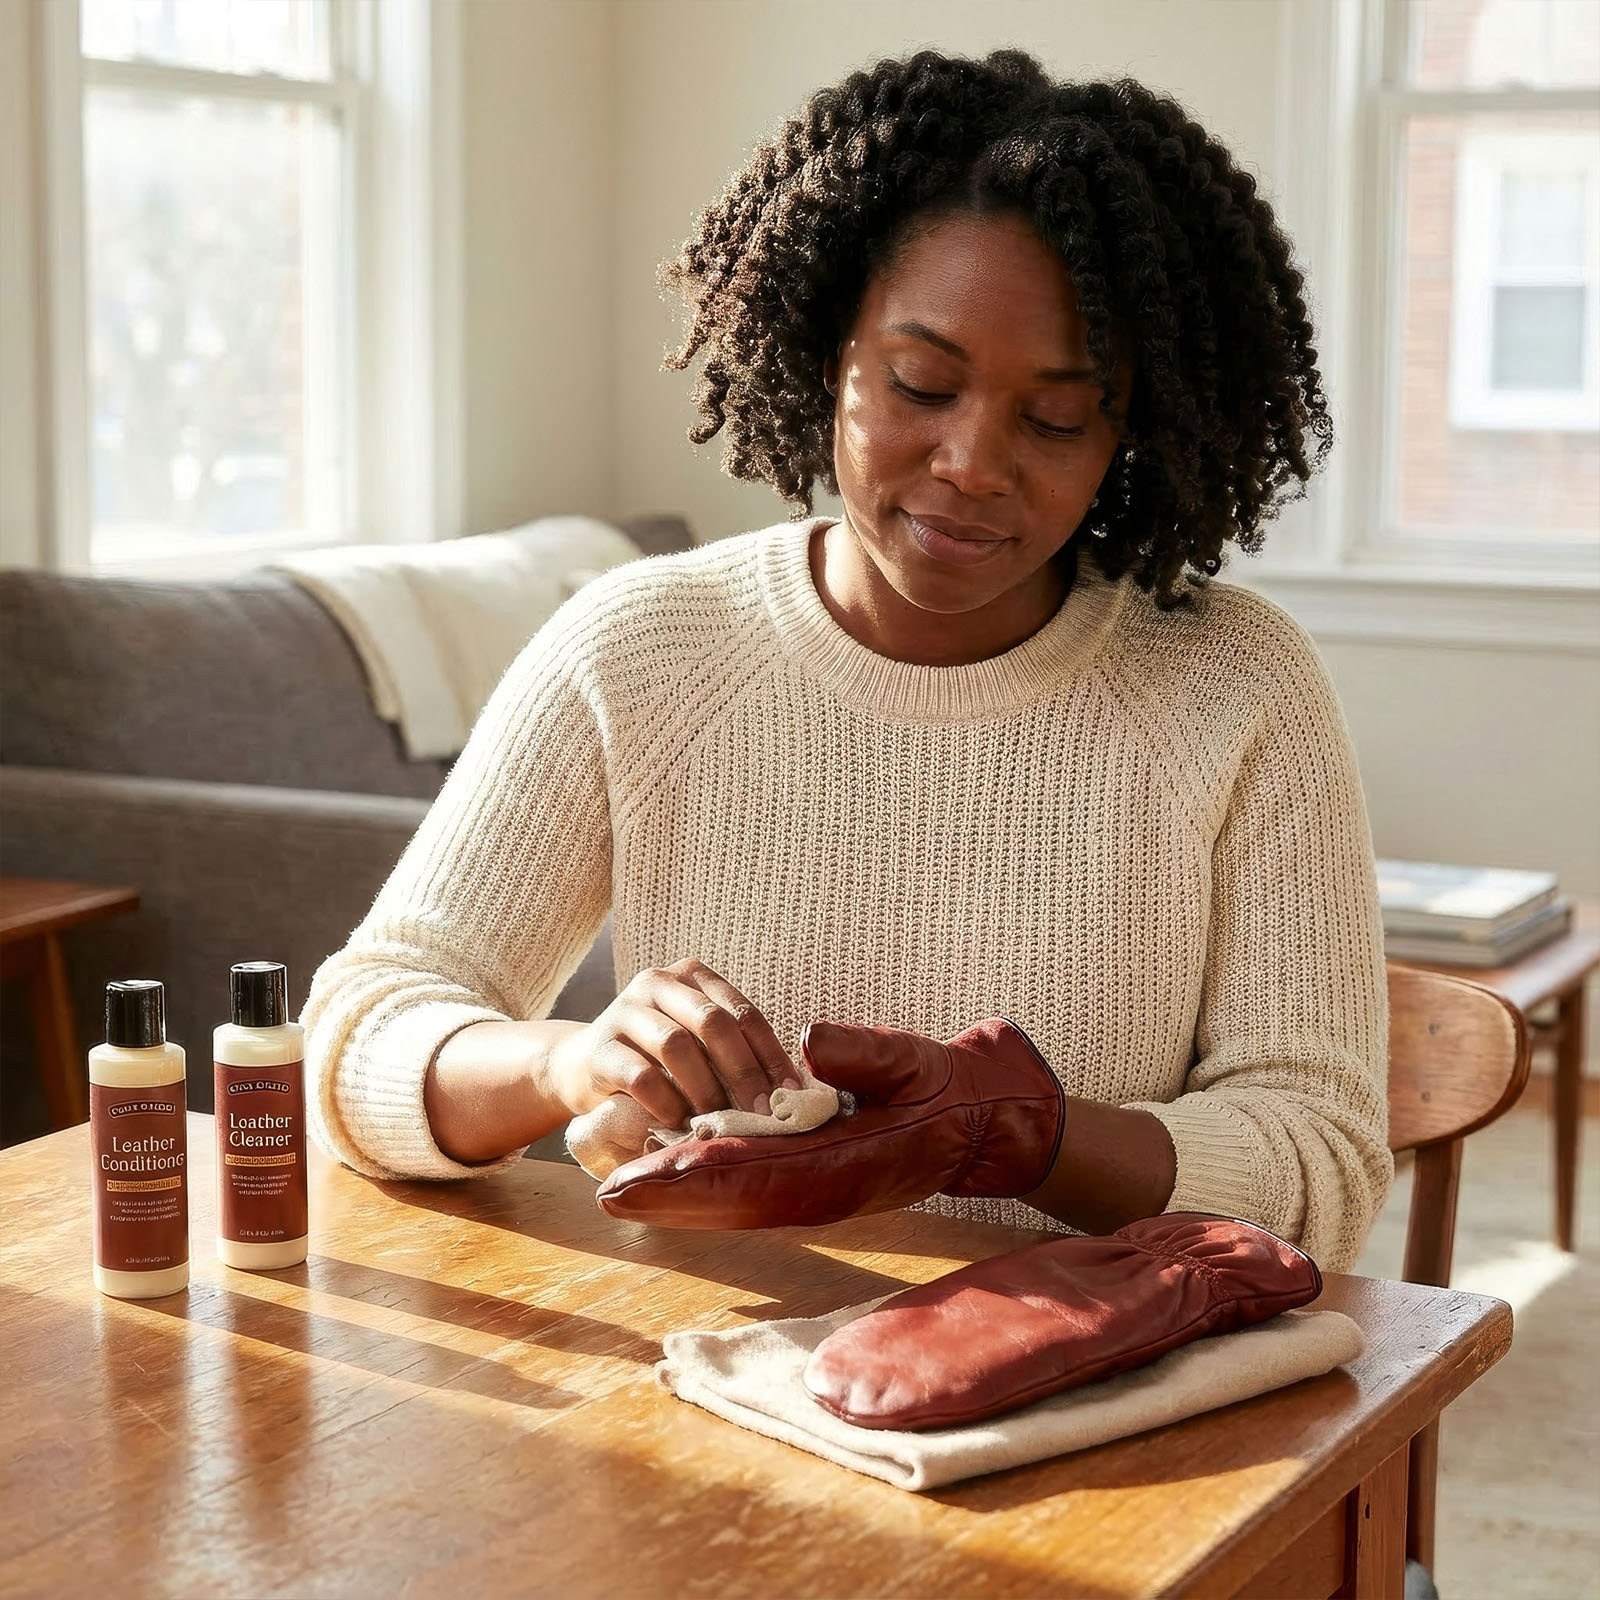
Step 2: Surface Cleaning (Dirt and Light Stains)

Now that you have identified your leather type, the next step is removing surface dirt and light stains without damaging the leather. Leather is a natural material, meaning it absorbs oils, moisture, and dirt over time. Cleaning it properly requires a gentle approach to avoid stripping the leather of its essential oils and protective coatings.

If leather is cleaned incorrectly, it can become stiff, cracked, or discolored. The goal of this step is to lift dirt and grime without soaking or weakening the leather fibers.

What You’ll Need
  • Microfiber cloth or soft sponge – For gentle wiping without scratching the leather.
  • Mild soap (Castile, saddle soap, or baby shampoo) – A gentle cleaner that won’t strip essential oils.
  • Lukewarm water – Just enough to create a light cleaning solution. Avoid hot or cold water, as extreme temperatures can alter the leather’s structure.
  • Leather conditioner (optional, for after drying) – Helps restore moisture after cleaning.

How to Clean the Surface of Leather Gloves

  1. Prepare a Cleaning Solution:
    • Fill a small bowl with lukewarm water.
    • Add one or two drops of mild soap. Stir gently to create a light lather.
  2. Dampen the Cloth:
    • Dip a microfiber cloth into the soapy water.
    • Wring it out thoroughly so the cloth is damp but not dripping. Excess water can soak into the leather and cause damage.
  3. Wipe the Gloves Gently:
    • Lay the gloves flat on a clean surface.
    • Using light circular motions, wipe down the leather, starting from the wrist and working towards the fingertips.
    • Focus on high-contact areas like palms, fingertips, and in between the fingers, as these collect the most dirt.
  4. Rinse the Cloth and Remove Soap Residue:
    • Rinse the microfiber cloth with clean, lukewarm water (no soap).
    • Wipe down the gloves again to remove any leftover soap residue. Soap left on leather can dry it out and cause it to feel rough.
  5. Let the Gloves Air Dry Properly:
    • Lay the gloves flat in a well-ventilated area away from direct sunlight or heat sources.
    • Let them dry at room temperature.
    • Every hour or so, put the gloves on for a few seconds to help them retain their shape. This prevents the leather from becoming stiff or misshapen.
  6. Optional: Apply Leather Conditioner (After Drying Completely):
    • If the leather feels dry after cleaning, apply a small amount of leather conditioner.
    • Use a soft cloth to rub it in gently, focusing on areas prone to cracking (knuckles, fingertips, and palm).
What to Avoid
  • Do not soak the gloves in water – Leather absorbs moisture, and too much water can make it stiff, brittle, or shrink.
  • Do not scrub aggressively – Harsh scrubbing can remove the protective surface coating of the leather.
  • Do not use harsh detergents, bleach, or alcohol-based cleaners – These strip natural oils and can discolor the gloves.
  • Do not dry with heat or direct sunlight – Heat can shrink and crack leather, permanently altering the shape and texture.
When to Use This Cleaning Method
  • Regular maintenance: Clean gloves once a month to remove dirt buildup.
  • After light use: If your gloves look slightly dirty but don’t have major stains, a quick wipe-down will keep them in good condition.
  • Before storage: If storing gloves for a long period, clean them first to prevent dirt from setting into the leather.

Cleaning leather gloves correctly and consistently extends their lifespan, keeps them comfortable, and maintains their original look and feel. Once the surface dirt is removed, you can move on to handling deeper stains in the next step.

Step 3: Removing Tough Stains (Ink, Oil, and Watermarks)

Even with regular cleaning, stubborn stains can set into leather gloves. Unlike fabric, leather absorbs oils, ink, and moisture, making stains more difficult to remove. The key to lifting stains without ruining the leather is using the right cleaning method for each type of stain.

In this step, you will learn how to remove three of the most common tough stains: ink, oil/grease, and watermarks. Each type of stain requires a different approach to avoid damaging the leather’s surface.

How to Remove Ink Stains

Ink stains are some of the hardest to remove because they soak into the leather quickly. The sooner you act, the better the chances of removing the stain without leaving a permanent mark.

What You’ll Need:
  • Rubbing alcohol (isopropyl alcohol) or non-acetone nail polish remover
  • Cotton swabs
  • Microfiber cloth
How to Remove:
  1. Dampen a cotton swab with rubbing alcohol or non-acetone nail polish remover.
  2. Gently dab (do not rub) the stained area. Rubbing can cause the ink to spread.
  3. As the ink transfers to the swab, switch to a clean side and continue dabbing.
  4. Repeat with a fresh swab until the stain lifts completely.
  5. Use a damp microfiber cloth to remove any residue.
  6. Let the gloves air dry completely before applying a leather conditioner.
What to Avoid:
  • Do not use acetone-based products, as they strip leather of its protective finish.
  • Do not rub the stain aggressively—this can push the ink deeper into the leather.

How to Remove Oil or Grease Stains

Oil and grease stains can spread and darken leather if not treated properly. Since leather absorbs oils, you need to pull the oil out rather than scrub it in.

What You’ll Need:
  • Cornstarch or baking soda
  • Soft brush or dry cloth
  • Leather cleaner (optional)
How to Remove:
  1. Blot excess oil with a dry microfiber cloth. Do not rub, as this will spread the stain.
  2. Sprinkle cornstarch or baking soda over the stained area. This absorbs the oil from the leather.
  3. Let it sit for several hours or overnight for deep-set stains.
  4. Use a soft brush or dry cloth to remove the powder.
  5. If the stain persists, repeat the process or use a small amount of leather cleaner on a microfiber cloth.
  6. Once the stain is gone, condition the leather to restore its natural moisture.
What to Avoid:
  • Do not use water to remove oil stains, as it can push the oil further into the leather.
  • Do not use dish soap or degreasers, as they can dry out the leather and cause cracking.

How to Remove Water Stains

Water stains happen when leather dries unevenly, leaving behind visible marks. Unlike oil or ink, water stains need to be blended rather than removed.

What You’ll Need:
  • Distilled water
  • Microfiber cloth
  • Leather conditioner
How to Remove:
  1. Lightly dampen a microfiber cloth with distilled water.
  2. Dab and wipe the entire glove lightly, not just the stained area. This prevents uneven drying.
  3. Let the gloves air dry at room temperature, away from direct sunlight or heat.
  4. Once fully dry, apply a small amount of leather conditioner to restore flexibility.
What to Avoid:
  • Do not apply water only to the stained area. It will create an uneven finish.
  • Do not dry the gloves near a heater or in direct sunlight, as heat can shrink or warp the leather.
When to Use These Methods
  • Fresh stains: Act immediately for the best results. The longer a stain sits, the harder it is to remove.
  • Set-in stains: May require multiple treatments. Be patient and repeat the process if necessary.
  • Preventative care: Regularly condition your gloves to create a barrier that helps prevent deep stains.

By treating stains correctly and carefully, you preserve the leather’s appearance and softness without causing further damage. After stain removal, make sure the gloves are completely dry before moving on to conditioning and restoring their flexibility.

Step 4: Cleaning the Inside of Leather Gloves

Many people focus on cleaning the outside of leather gloves but forget about the interior. Over time, sweat, body oils, and dirt build up inside, leading to odor, bacteria growth, and even deterioration of the lining. If your gloves feel damp inside, have a strong smell, or just haven’t been cleaned in a long time, it’s time to refresh them properly.

Unlike the exterior, the inside of leather gloves cannot be scrubbed aggressively or soaked in water, as moisture can get trapped inside the leather, causing stiffness or mildew. Instead, use dry cleaning methods for deodorizing and spot-cleaning techniques for light stains.

How to Clean the Inside of Leather Gloves

The cleaning method depends on whether your gloves have a lining or are unlined. Follow the steps below based on your glove type.

For Fabric-Lined Gloves (Silk, Wool, Cashmere, Fleece, or Cotton Linings)

Fabric-lined gloves are more absorbent and trap more sweat and dirt. Because the lining cannot be removed, cleaning must be done carefully to avoid soaking the leather.

What You’ll Need:
  • Baking soda or cornstarch (for deodorizing)
  • White vinegar or rubbing alcohol (for bacteria removal)
  • Soft cloth or sponge
  • Lukewarm water
How to Clean:
  1. Deodorize with Baking Soda:
    • Sprinkle baking soda or cornstarch inside the gloves to absorb sweat and odor.
    • Let them sit overnight.
    • Shake out the powder the next day.
  1. Sanitize with Vinegar or Rubbing Alcohol:
    • Dampen a soft cloth with a mix of equal parts white vinegar and water (or rubbing alcohol).
    • Gently wipe the inside of the gloves without oversaturating them.
    • Turn the gloves inside out if possible and allow them to air dry completely.
  1. Remove Stains (If Needed):
    • Lightly dab mild soap and water on stained areas with a damp cloth.
    • Do not scrub, as this can weaken the lining.
    • Wipe away the soap with a clean, damp cloth and let air dry.

For Unlined Leather Gloves (Direct Skin Contact with Leather)

Unlined gloves absorb sweat directly into the leather, making them more prone to odors and bacteria buildup. Because there’s no fabric barrier, cleaning must be even gentler to prevent damaging the leather.

What You’ll Need:
  • A slightly damp cloth (not wet)
  • White vinegar (for odor and bacteria control)
  • Cornstarch or baking soda (for sweat absorption)
How to Clean:
  1. Lightly Wipe the Interior:
    • Dampen a soft cloth with a mix of equal parts white vinegar and water.
    • Gently wipe the inside of the gloves to remove bacteria and refresh the leather.
  1. Absorb Excess Moisture:
    • Sprinkle cornstarch or baking soda inside to help dry up lingering sweat.
    • Let it sit for a few hours, then shake out the excess.
  1. Air Dry Completely:
    • Place the gloves in a well-ventilated area to ensure they dry fully before wearing them again.
    • Avoid direct sunlight or heat sources, as they can dry out the leather.

What to Avoid When Cleaning the Inside of Leather Gloves

  • Do not soak the gloves in water. Leather absorbs moisture, which can lead to stiffness and shrinkage.
  • Do not scrub the lining aggressively. Delicate linings like silk or cashmere can tear easily.
  • Do not use bleach or harsh chemicals. These can damage both the leather and fabric linings.
  • Do not put gloves in a dryer. Heat will shrink and warp the leather.

How Often Should You Clean the Interior?

  • Light use: Clean the inside of your gloves every few months to keep them fresh.
  • Heavy use (daily wear, winter gloves): Clean once a month or whenever they start to smell.
  • Before storing: Always clean the inside before putting gloves away for an extended period to prevent odor buildup.

Properly cleaning the inside of your leather gloves not only makes them more comfortable to wear but also extends their lifespan. A fresh interior helps prevent unpleasant odors, keeps the lining soft, and maintains the overall hygiene of your gloves. Once the inside is clean and fully dry, you can move on to conditioning and restoring flexibility in the next step.

Step 5: Conditioning Leather Gloves to Prevent Cracking

Once your leather gloves are clean and fully dry, the next crucial step is conditioning. Leather, much like skin, needs moisture to stay supple and flexible. Without proper conditioning, it dries out, becomes stiff, and may even crack over time.

Cleaning removes dirt and grime, but it also strips some of the natural oils that keep leather soft. Conditioning replenishes these oils, restoring elasticity and preventing the gloves from feeling rough or brittle.

This step is essential for all types of leather gloves, whether they are work gloves, dress gloves, or everyday casual wear.

Why Conditioning is Important
  • Prevents Drying and Cracking – Leather naturally loses moisture over time, especially after exposure to soap and water. Conditioning replaces the lost oils.
  • Restores Softness – A good conditioner makes gloves feel smooth and comfortable again.
  • Maintains Flexibility – Helps leather move naturally with your hands without stiffening.
  • Prolongs Lifespan – Regular conditioning keeps gloves looking new and increases durability.
What You’ll Need
  • Leather conditioner – Look for a cream or balm specifically designed for leather gloves. Avoid heavy waxes or petroleum-based products.
  • Soft cloth – A microfiber or lint-free cloth works best for applying the conditioner.
  • A dry area – Gloves should be conditioned in a well-ventilated, room-temperature space.

How to Condition Leather Gloves

  1. Ensure the Gloves Are Completely Dry
    • If the gloves are damp, do not apply conditioner yet. Let them dry fully at room temperature before proceeding.
  2. Apply a Small Amount of Conditioner to a Soft Cloth
    • Do not apply the conditioner directly to the gloves. Instead, place a small amount on the cloth.
    • A dime-sized amount is usually enough to start with. You can add more if needed.
  3. Gently Massage the Conditioner into the Leather
    • Using light circular motions, rub the conditioner into the leather.
    • Pay special attention to areas that move the most, such as the fingers, knuckles, and palm.
  4. Let the Conditioner Absorb
    • Allow the gloves to sit for at least 30 minutes so the leather can fully absorb the conditioner.
    • If the gloves feel dry after this time, apply a second thin layer.
  5. Buff Off Any Excess Conditioner
    • Use a clean, dry cloth to buff away any leftover residue. This prevents the leather from feeling greasy or sticky.
    • Gloves should feel smooth, not oily.
  6. Let the Gloves Rest Before Wearing
    • Leave the gloves in a cool, dry place for a few hours before putting them on. This allows the conditioner to settle into the leather.

What to Avoid When Conditioning Leather Gloves

  • Do not over-apply conditioner. Too much product can clog the leather’s pores, making gloves feel heavy or sticky.
  • Do not use household oils like olive oil or coconut oil. These can cause the leather to darken unevenly and leave a residue.
  • Do not use conditioners meant for shoes or furniture. These are often too thick and can change the texture of your gloves.
  • Do not rush the absorption process. Conditioning takes time to fully restore the leather.

How Often Should You Condition Leather Gloves?

  • Occasional Use: Condition every 3-6 months to maintain softness.
  • Frequent Use: Condition every 1-2 months, especially in dry climates.
  • After Cleaning: Always condition after washing or stain removal to replenish lost moisture.
  • Before Storing: If putting gloves away for the season, condition them first to prevent drying out.

By following this conditioning process, your leather gloves will remain soft, durable, and comfortable for years to come. Once conditioned, they are ready for daily wear or safe storage.

Drying Leather Gloves the Right Way

Drying leather gloves properly is one of the most critical steps in maintaining their shape, softness, and longevity. If gloves dry too quickly, unevenly, or under the wrong conditions, the leather can shrink, stiffen, crack, or lose its natural flexibility. Improper drying is one of the leading causes of damage to leather gloves, making them uncomfortable and even unusable.

Many people unknowingly ruin their gloves by exposing them to direct heat, sunlight, or using artificial drying methods like hair dryers or radiators. Leather is a natural material that must dry slowly and evenly to preserve its structure.

What Happens If You Dry Leather Gloves Incorrectly?

  • Shrinkage: Leather that dries too quickly will contract, making gloves too tight and uncomfortable.
  • Stiffness and Cracking: Rapid moisture loss removes the natural oils in the leather, leading to a rough, brittle texture.
  • Misshaping: Gloves left in awkward positions while drying can warp and lose their original fit.
  • Color Fading: Direct sunlight can cause discoloration and uneven fading, making gloves look worn out.

How to Dry Leather Gloves Safely

1. Remove Excess Moisture
  • If your gloves are damp but not soaked, use a clean, dry microfiber cloth to gently blot the surface and absorb as much moisture as possible.
  • Do not wring or twist the gloves to remove water, which will distort the shape and damage the leather fibers.
2. Lay Flat to Dry in a Well-Ventilated Area
  • Place gloves on a dry, flat surface away from direct sunlight and heat sources.
  • If the gloves are heavily soaked, stuff them loosely with paper towels or a soft cloth to help absorb moisture and maintain shape.
  • Change the paper towels every few hours to speed up the drying process.
3. Put the Gloves On Occasionally as They Dry
  • Every few hours, gently put the gloves on your hands for a few seconds. This helps retain their original fit and flexibility as they dry.
  • If gloves start feeling stiff, gently flex your fingers inside them to keep the leather supple.
4. Allow Gloves to Dry Naturally at Room Temperature
  • Leather needs time to dry evenly, so expect this process to take 24 to 48 hours depending on how wet the gloves are.
  • Patience is key. Do not attempt to speed up drying with artificial heat sources like hair dryers, radiators, or direct sunlight.

What to Avoid When Drying Leather Gloves

  • No Hair Dryers or Heaters: Heat causes leather to shrink, stiffen, and lose its flexibility.
  • No Direct Sunlight: UV exposure can dry out the leather too quickly, causing cracking and fading.
  • No Hanging on Hooks or Clotheslines: Hanging gloves while wet can stretch the leather, leading to a misshapen fit.
  • No Storing While Damp: Never store gloves before they are completely dry, as trapped moisture can cause mold or mildew.

How to Restore Softness After Drying

If your gloves feel stiff or dry after air drying, follow these steps to restore flexibility:

  1. Apply Leather Conditioner
    • Once gloves are completely dry, rub a small amount of leather conditioner into the leather using a soft cloth.
    • Focus on areas prone to stiffness, such as the fingers and palm.
  1. Gently Work the Leather
    • Put the gloves on and flex your fingers to help soften the material naturally.
    • If gloves remain stiff, apply another thin layer of conditioner, and let them sit for a few hours.
  1. Buff with a Dry Cloth
    • After conditioning, use a clean, dry microfiber cloth to buff away any excess product, ensuring a smooth, non-greasy finish.

How Long Does It Take to Dry Leather Gloves?

  • Lightly Damp Gloves: 12-24 hours.
  • Soaked Gloves (Heavy Water Exposure): 24-48 hours.

Drying time varies based on the thickness of the leather and the surrounding humidity. Always allow enough time for gloves to dry naturally before wearing or storing them.

How Often Should You Clean Leather Gloves?

Leather gloves are an investment, and like any investment, they require regular care to maintain their quality, softness, and durability. However, over-cleaning can be just as damaging as neglect, so it’s important to clean them at the right frequency based on how often they are worn and the conditions they are exposed to.

Some people wait until their gloves look visibly dirty before cleaning, but by then, dirt, sweat, and oils may have already penetrated the leather, leading to stiffness, cracking, and long-term damage. On the other hand, excessive cleaning can strip away the natural oils that keep leather supple.

Below is a recommended cleaning schedule based on different usage scenarios.

  1. Light or Occasional Use (Once Every 3-6 Months)

Who this applies to:

  • Leather dress gloves worn only in winter or for special occasions.
  • Gloves that rarely encounter dirt, sweat, or moisture.
Recommended cleaning routine:
  • Surface cleaning: Wipe with a dry microfiber cloth after every few wears to remove dust.
  • Deep cleaning: Once every three to six months to remove any hidden oils or minor buildup.
  • Conditioning: After every cleaning session to keep the leather from drying out.

Leather gloves that are used occasionally don’t accumulate as much dirt or sweat, so frequent washing isn’t necessary. However, they should still be maintained to prevent leather from drying out over time.

  1. Regular or Moderate Use (Once a Month or as Needed)

Who this applies to:

  • Leather gloves worn a few times per week during colder months.
  • Casual gloves used for everyday tasks like driving, commuting, or walking.
Recommended cleaning routine:
  • Surface cleaning: Wipe gloves down once a week with a damp microfiber cloth to remove surface oils and dirt.
  • Deep cleaning: Once a month or whenever gloves start to feel dirty or stiff.
  • Conditioning: Every 1-2 months, depending on climate and usage.

Regularly worn gloves accumulate more sweat, body oils, and environmental dirt, which can degrade the leather over time. Monthly cleaning prevents buildup while maintaining the natural softness of the leather.

  1. Heavy or Daily Use (Every 2-3 Weeks or as Needed)

Who this applies to:

  • Work gloves, motorcycle gloves, and gloves used for outdoor activities.
  • Gloves worn daily in wet, cold, or humid conditions.
  • Gloves that are frequently exposed to dirt, grease, or chemicals.
Recommended cleaning routine:
  • Surface cleaning: After each use, wipe gloves down with a clean, dry cloth. If exposed to moisture, pat them dry and let them air out overnight.
  • Deep cleaning: Every 2-3 weeks to remove sweat, grime, and oils.
  • Conditioning: Every 2-4 weeks, as frequent use dries out leather quickly.

Gloves that are exposed to extreme conditions or worn daily require more frequent care to prevent deterioration. Without proper maintenance, leather can stiffen, crack, or develop an unpleasant odor.

  1. Special Situations That Require Immediate Cleaning

There are times when gloves must be cleaned immediately to prevent permanent damage. These include:

  • After exposure to rain or snow: If gloves get wet, they need to be dried and conditioned as soon as possible to prevent stiffness.
  • If stained with oil, ink, or food: The longer a stain sits, the harder it is to remove. Treat stains immediately using the proper stain-removal techniques.
  • If gloves develop an odor: This is a sign of bacteria buildup, often from sweat or moisture trapped inside. Clean and deodorize them as soon as possible.

How to Know It’s Time to Clean Your Gloves

Not sure when your gloves need cleaning? Look for these signs of buildup and wear:

  • The leather looks dull or discolored.
  • The gloves feel stiff, rough, or dry.
  • There is visible dirt, stains, or fingerprints.
  • They develop an unpleasant smell.
  • The interior lining feels damp or sticky.

If any of these signs appear, it’s time for a cleaning session. Regular maintenance keeps leather gloves looking and feeling their best while ensuring they last for years.

By following a consistent but not excessive cleaning routine, you can preserve your leather gloves’ softness, flexibility, and overall condition for a long time.

Final Thoughts

Cleaning leather gloves the right way ensures they last for years without losing their softness, shape, or elegance. By following this step-by-step guide, you can safely remove dirt, stains, and odors while keeping your gloves in top condition.

Key Takeaways:

  • Never machine wash leather gloves. Hand clean only.
  • Use mild soap and lukewarm water for surface dirt.
  • Treat stains properly (rubbing alcohol for ink, cornstarch for oil, vinegar for water stains).
  • Clean the interior gently using baking soda or a vinegar solution.
  • Condition leather after cleaning to maintain flexibility.
  • Air dry properly to prevent shrinkage or cracking.

With these expert leather care tips, you’ll keep your gloves looking new for years—no cracks, no stiffness, just perfectly soft leather ready to wear anytime.

Related Articles